
SharePoint 2013 has nice little tiles called Promoted Links to link to stuff all over your sites. However, they all display horizontally when you add them to your page. Silly Microsoft for not providing us the option to list them horizontally or vertically in the first place – but thank you SharePoint community for providing the work-around, (and specifically in this case, David Lozzi)! 🙂 I love copy / paste code!! Learn how to do this from our discussion on Yammer – thanks for your help David!

================================================================
Post Blog Update : So it seems not everyone is on Yammer. Instructions and code copied and pasted below for your convenience. 🙂
<style type=”text/css”>
.ms-promlink-body {width: 170px }
.ms-promlink-header {display: none}
</style>
Drop it into the Edit Source bit of the Content Editor Web Part on the page to make it work. If the web part is too wide, insert it into a table first and shrink the column width accordingly.
To make one set of links vertical and the other horizontal :
<style type=”text/css”>
#msozonecell_webpartwpq6 .ms-promlink-body {width: 170px }
#msozonecell_webpartwpq6 .ms-promlink-header {display: none}
</style>
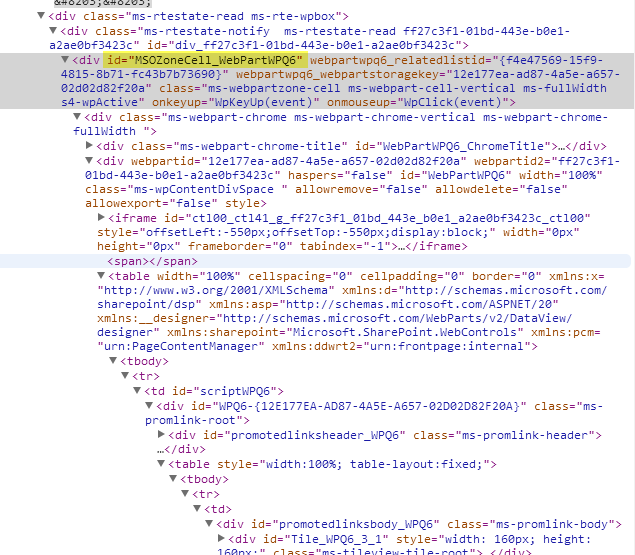
Add the web part’s ID, as indicated by the #. HOWEVER You’ll need to find YOUR web part ID. To do so, use your dev tool bar (see here for more details) and click on one of the promo links, then navigate up the tree until you find your DIV with a similar ID as noted above, chances are the only change will be the number at the end, like this.
And then also learn how to wrap tiles here.

I’m trying to create a webpart that contains a vertical list, the list is coming from another page as an app. I’ve tried doing this and all it does is show up in dataview.
The information you posted above! Are you implying that I can go into designer and apply that code and it will change the veiw?
LikeLike
I have read so many articles regarding the blogger lovers except this piece of writing is actually a nice paragraph, keep it up.
LikeLike
When some one searches for his required thing, therefore he/she wishes to be
available that in detail, thus that thing is maintained over here.
LikeLike